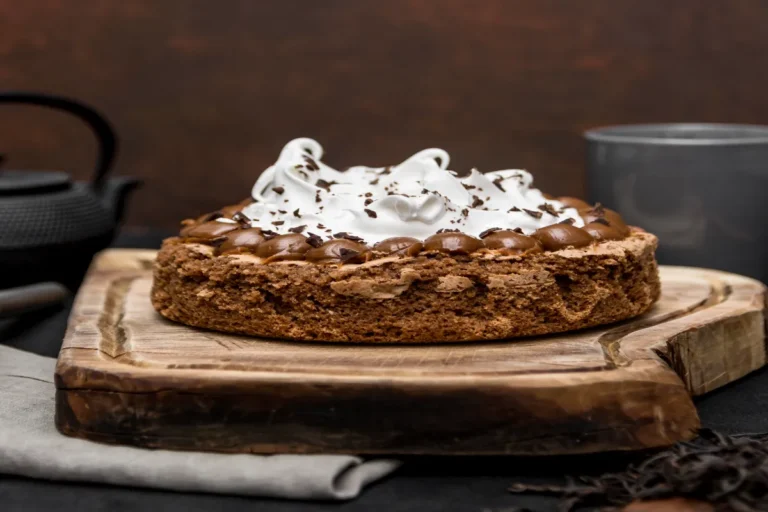
If you’re searching for an indulgent, no-bake dessert that’s rich, creamy, and packed with irresistible flavors, look no further than this Cream Cheese Mousse Cake with Oreo crust and Peanut Butter Cups. This cake combines the luxurious texture of a cream cheese mousse with a crunchy Oreo base and the nutty, sweet richness of peanut butter cups. The result is a dessert that appeals to peanut butter and chocolate lovers alike. It’s the perfect dessert for a family gathering, special celebration, or just a treat to enjoy at home.
With a preparation that doesn’t require an oven, this no-bake cake is not only easy to make but also ideal for hot summer days when you want a chilled dessert. In this comprehensive guide, we’ll walk you through how to make this delicious mousse cake, offer variations, and answer common questions to ensure your cake turns out perfectly every time.
What Makes This Cream Cheese Mousse Cake So Special?
What makes this Cream Cheese Mousse Cake unique is the combination of flavors and textures. The Oreo crust provides a crunchy and chocolatey base that complements the airy and creamy mousse. The addition of peanut butter cups throughout the mousse adds richness and a slight saltiness, creating a beautiful balance between sweet and savory.
The no-bake aspect of this cake makes it accessible to even the most novice bakers. You don’t need to worry about tricky baking techniques; just assemble, chill, and enjoy!
If you enjoy mousse-based desserts, you might also want to try this cheesecake mousse, which offers a similar airy texture with different flavor profiles.
Ingredients for Cream Cheese Mousse Cake with Oreo Crust and Peanut Butter Cups
1. The Oreo Crust
- Oreos (about 25 cookies, crushed)
- Butter (1/2 cup, melted)
The Oreo crust provides the solid foundation of this dessert, and its chocolatey richness perfectly balances the smooth, sweet mousse. When the Oreos are combined with melted butter, they form a compact, crunchy base that supports the layers of mousse.
2. Cream Cheese Mousse Filling
- Cream Cheese (16 oz, softened)
- Powdered Sugar (1 cup)
- Vanilla Extract (1 tsp)
- Heavy Whipping Cream (2 cups, cold)
- Peanut Butter Cups (12-15, chopped)
The mousse filling is where this cake truly shines. The cream cheese and powdered sugar create a rich, tangy base, while the whipped cream lightens the texture. Peanut butter cups provide both flavor and texture, enhancing the creaminess of the mousse with bursts of peanut butter and chocolate in every bite.
3. Chocolate Ganache Topping (Optional)
- Dark Chocolate (8 oz, chopped)
- Heavy Cream (1/2 cup)
Adding a chocolate ganache topping takes this cake to the next level. The silky ganache adds a glossy finish and an extra layer of chocolatey goodness, making the cake as stunning as it is delicious.
For another delicious no-bake treat, check out this chocolate-covered Ritz crackers recipe, which combines similar sweet and salty flavors.
How to Make the Cake: Step-by-Step Instructions
1. Making the Oreo Crust
- Step 1: Start by crushing the Oreos. You can use a food processor for finely ground crumbs or place the cookies in a plastic bag and smash them with a rolling pin until they form fine crumbs.
- Step 2: In a medium bowl, mix the crushed Oreos with the melted butter. Stir until the crumbs are evenly moistened.
- Step 3: Press the mixture firmly into the bottom of a 9-inch springform pan. Use the bottom of a measuring cup or glass to ensure the crust is even and tightly packed. Freeze for 10 minutes to allow the crust to set.
2. Preparing the Cream Cheese Mousse
- Step 1: In a large bowl, beat the cream cheese and powdered sugar together until smooth and creamy. Make sure the cream cheese is softened to avoid lumps.
- Step 2: Add the vanilla extract and mix until well combined.
- Step 3: In a separate bowl, whip the heavy cream until stiff peaks form. Be careful not to over-whip, as the cream can become grainy.
- Step 4: Gently fold the whipped cream into the cream cheese mixture, being careful to maintain the light, airy texture of the mousse.
- Step 5: Stir in the chopped peanut butter cups, folding them in gently to distribute them evenly throughout the mousse.
3. Assembling the Cake
- Step 1: Pour the prepared mousse mixture over the chilled Oreo crust. Use a spatula to spread the mousse evenly and smooth the top.
- Step 2: For added texture and flavor, sprinkle additional chopped peanut butter cups on top.
- Step 3: Refrigerate the cake for at least 4 hours, or ideally overnight, to allow the mousse to firm up and the flavors to meld.
For tips on creating the perfect layered mousse cake, take a look at this blackberry cheesecake recipe, which also uses a layered technique to create a visually appealing dessert.
4. Optional Chocolate Ganache Topping
- Step 1: To make the ganache, heat the heavy cream in a small saucepan over medium heat until it just begins to simmer.
- Step 2: Remove the cream from the heat and pour it over the chopped dark chocolate. Let the mixture sit for a minute before whisking until smooth and glossy.
- Step 3: Pour the ganache over the top of the mousse cake, allowing it to drizzle down the sides for a beautiful, professional finish. Let the ganache set in the fridge for about an hour before serving.
Variations and Customizations
While the classic recipe is delicious on its own, there are plenty of ways to customize this Cream Cheese Mousse Cake to suit your preferences. Here are a few variations:
1. Peanut Butter Lovers’ Dream
For those who can’t get enough peanut butter, consider:
- Swapping out some of the cream cheese for peanut butter to create a more intensely peanut butter-flavored mousse.
- Using peanut butter Oreos for the crust instead of regular Oreos.
- Adding a layer of peanut butter on top of the Oreo crust before adding the mousse.
2. Chocolate Explosion
If you’re a true chocolate lover, take this cake to the next level by:
- Using double-stuffed Oreos for a richer, thicker crust.
- Adding a layer of chocolate mousse or chocolate pudding on top of the cream cheese mousse for a layered effect.
- Mixing chocolate chips into the mousse for extra bites of chocolate.
3. Gluten-Free Option
To make this cake gluten-free:
- Use gluten-free Oreos for the crust.
- Ensure that your peanut butter cups and other ingredients are certified gluten-free.
This variation will allow everyone to enjoy the cake, even those with gluten sensitivities.
For another peanut butter-inspired dessert, try this strawberry cheesecake Snickers recipe, which combines layers of cheesecake and Snickers for a flavor-packed treat.
Serving and Storing Cream Cheese Mousse Cake
1. Serving Tips
This Cream Cheese Mousse Cake is best served chilled straight from the refrigerator. For neat, professional-looking slices, use a sharp knife and run it under hot water between each cut to prevent the mousse from sticking. Garnish each slice with additional chopped peanut butter cups, a drizzle of chocolate ganache, or even a dollop of whipped cream for an extra touch of indulgence.
Pair this rich dessert with a cup of coffee, a glass of cold milk, or a scoop of vanilla ice cream for the perfect end to any meal.
2. Storage Instructions
- Refrigeration: Store the cake in an airtight container in the refrigerator for up to 5 days. The mousse will stay creamy and the crust will maintain its crunch, making this an excellent make-ahead dessert.
- Freezing: This cake also freezes beautifully. Slice the cake into individual portions and wrap each piece in plastic wrap, then store them in a freezer-safe container or bag. Frozen slices can last up to 3 months. To serve, simply thaw a slice in the refrigerator for a few hours or overnight.
FAQs About Cream Cheese Mousse Cake
1. Can I make this cake ahead of time?
Yes, this cake is perfect for making ahead. In fact, it needs several hours in the fridge to set properly, so it’s best to make it the night before you plan to serve it. This makes it a great dessert option for parties or gatherings since you can prepare it in advance.
2. Can I use a different crust instead of Oreo?
Absolutely! While the Oreo crust is a fan favorite, you can substitute it with graham crackers, digestive biscuits, or even a brownie base. Each option offers a slightly different flavor and texture but will still provide a delicious foundation for the mousse.
3. What’s the best way to keep the mousse light and fluffy?
The key to achieving a light and fluffy mousse is to carefully fold the whipped cream into the cream cheese mixture. Be gentle and avoid overmixing, as this can cause the mousse to deflate and become dense. Using cold ingredients will also help maintain the mousse’s airy texture.
4. Can I make this cake without peanut butter?
Yes! If you or someone you’re serving has a peanut allergy or you simply prefer not to use peanut butter, you can substitute the peanut butter cups with other candies like Snickers, Kit Kats, or even chopped chocolate bars. You can also add fresh fruit like strawberries or bananas for a refreshing twist.
For another fruity take on mousse, try this chocolate and white chocolate mousse recipe, which incorporates both light and dark chocolate layers for a beautiful presentation.
Conclusion: A Decadent, No-Bake Dessert That Everyone Will Love
This Cream Cheese Mousse Cake with Oreo crust and Peanut Butter Cups is an absolute show-stopper. Its combination of rich flavors, smooth texture, and crunchy base makes it a crowd-pleaser for any occasion. Whether you’re making it for a birthday, holiday, or just to satisfy your sweet tooth, this cake is sure to impress.
With endless possibilities for customization, you can easily make this recipe your own. Whether you choose to add more peanut butter, double the chocolate, or make a gluten-free version, the result will always be a deliciously creamy and indulgent cake.
Enjoy making and sharing this dessert with friends and family—it’s a guaranteed hit!
For more sweet inspiration, don’t forget to explore other mouthwatering desserts like this Christmas crack recipe that’s perfect for the holiday season!